-
Bug
-
Resolution: Done
-
Blocker
-
None
-
None
-
None
-
Quality / Stability / Reliability
-
False
-
-
False
-
-
-
OCMUI Core Sprint 257
Steps to Reproduce
1) Launch the staging environment and click on the OSD cluster creation button
2) Select the cloud provider type as AWS, subscription type as annual, and billing type as Customer cloud subscription
3) Select the region as us-west-2, availability as multi-zone, and click on the next button
4) Once the user is on the machine pool page, select autoscaling. Enter the valid value for the min and max node count, and click on the next button.
5) Select the cluster type as public and select the checkbox Install into an existing proxy.
6) Select the Ingress type as custom and provide valid values for the fields displayed.
7) Once the user is on the vpc page, select the valid values for VPC and subnets and click on the next button.
8) On the proxy settings page, enter a value for http proxy, https proxy, domain name such as http://test.com, https://test.com etc and click on the next button.
9) Keep the CIDR default values unchanged and click on the submit button.
Expected Result
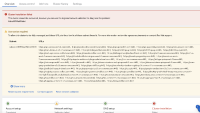
On the cluster overview page, there should be a banner showing the progress of a series of steps i.e Account setup, Network verifier
Actual Result
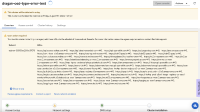
Type error is shown on the overview page when the network verifier check fails
- relates to
-
OCMUI-2049 [OCM UI QE] Create test scripts for OSD AWS CCS Advanced cluster
-
- Closed
-
-
OCMUI-2161 [Cluster Details] Add URL check to Network validation unit test
-
- Closed
-
- mentioned on


