-
Bug
-
Resolution: Done
-
 Major
Major
-
3.3.0.Beta1
-
None
-
1.) EXEC: create Richfaces Project by clicking the appropriate link in central

and step through the wizard. You'll get a richfaces project most likely called richfaces-webapp
2.) EXEC: launch OpenShift Express Application wizard, provide crendetials
3.) EXEC: choose a new application name and jbossas-7 type
4.) EXEC: check use existing and choose your richfaces-webapp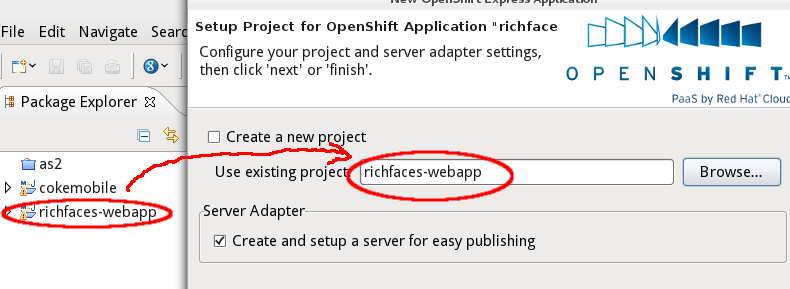
5.) EXEC: choose to create server adapter, hit finish
6.) EXEC: choose Publish in the context menu of your OpenShift server adapter, confirm to publish even though the adapter eventually tells you that there are no changes to publishResult:
Publishing is successfull, but if you look more closely at console output, you'll spot the following:[WARNING] The requested profile "openshift" could not be activated because it does not exist.
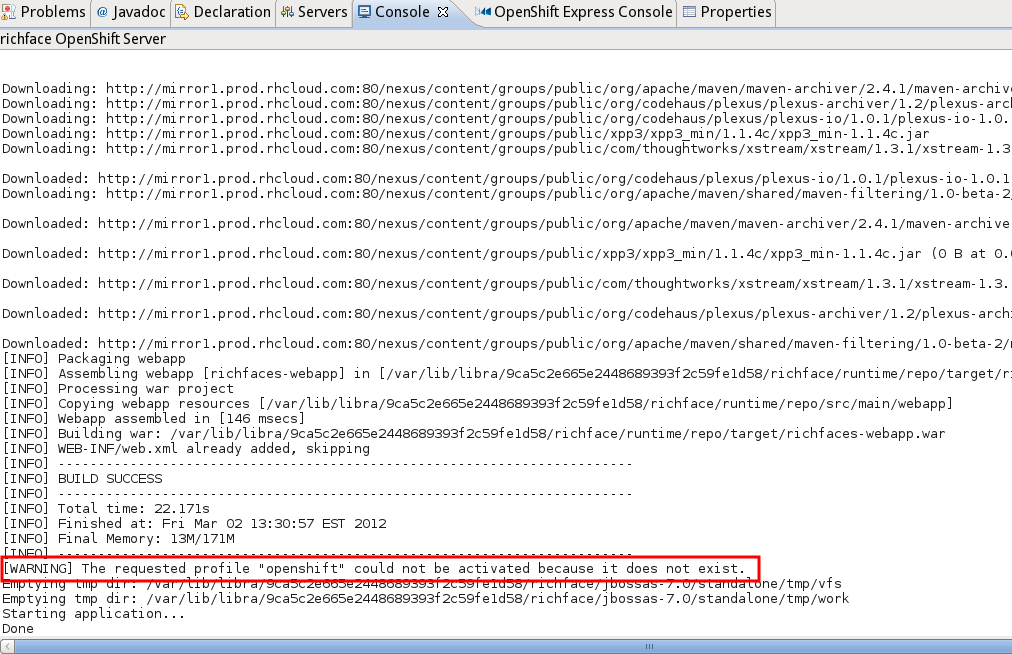
If you check the pom of your richfaces-webapp you'll see that the openshift profile is missing, it was not merged in.
1.) EXEC: create Richfaces Project by clicking the appropriate link in central and step through the wizard. You'll get a richfaces project most likely called richfaces-webapp 2.) EXEC: launch OpenShift Express Application wizard, provide crendetials 3.) EXEC: choose a new application name and jbossas-7 type 4.) EXEC: check use existing and choose your richfaces-webapp 5.) EXEC: choose to create server adapter , hit finish 6.) EXEC: choose Publish in the context menu of your OpenShift server adapter, confirm to publish even though the adapter eventually tells you that there are no changes to publish Result: Publishing is successfull, but if you look more closely at console output, you'll spot the following: [WARNING] The requested profile "openshift" could not be activated because it does not exist. If you check the pom of your richfaces-webapp you'll see that the openshift profile is missing, it was not merged in.


- relates to
-
-

- Closed
-
-
-
- Closed
-
