Uploaded image for project: 'Database as a Service'
  1. Database as a Service
  2. DBAAS-1194

[RHODA][R5]Cancel button after provisioning database instance takes back to Create New Database Instance screen on Developer perspective

XMLWordPrintable

    • Icon: Bug Bug
    • Resolution: Done
    • Icon: Undefined Undefined
    • 0.4.0 [R5]
    • 0.4.0 [R5]
    • None
    • None
    • False
    • None
    • False
    • No
    • Hide
      1. Login To Openshift with valid credentials
      2. Make sure RHODA operator installed successfully
      3. Import database provider accounts on redhat-dbaas-operator namespace
      4. Navigate to Developer's perspective and Create a project
      5. Click on "+Add --> Cloud-hosted Database" and Select a Database provider from the "Cloud-hosted database" page
      6. On the right side pop up window, Click "Add to topology" button
      7. On Add to topology screen, Select imported provider account from "Provider Account" drop down and click on "Create New Database Instance" link
      8. Enter the required details on "Create New Database Instance" screen and Click on "Create"
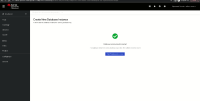
      9. After the successful provisioning of Database instance, the page would navigate to Database provisioning success screen. Click on "View Database Instances" button
      10. The page navigate to Add database to Topology screen
      11. Click on "Cancel" button at the bottom of the screen
      12. The application navigates to "Create Database Instance" screen instead of "Cloud-Hosted Database" screen.
      Show
      Login To Openshift with valid credentials Make sure RHODA operator installed successfully Import database provider accounts on redhat-dbaas-operator namespace Navigate to Developer's perspective and Create a project Click on "+Add --> Cloud-hosted Database" and Select a Database provider from the "Cloud-hosted database" page On the right side pop up window, Click "Add to topology" button On Add to topology screen, Select imported provider account from "Provider Account" drop down and click on "Create New Database Instance" link Enter the required details on "Create New Database Instance" screen and Click on "Create" After the successful provisioning of Database instance, the page would navigate to Database provisioning success screen. Click on "View Database Instances" button The page navigate to Add database to Topology screen Click on "Cancel" button at the bottom of the screen The application navigates to "Create Database Instance" screen instead of "Cloud-Hosted Database" screen.
    • Moderate

      On Developer perspective, after provisioning database instance if the user clicks on cancel button from "View Database Instances" / "Add to Topology" screen, the page navigates again to "Create New Database Instance" screen instead of "Cloud-hosted Database" screen. Expecting the Button to cancel the process instead the button acts with back action.
              rhn-support-rravi Rajan Ravi
              rhn-support-rravi Rajan Ravi
              Votes:
              0 Vote for this issue
              Watchers:
              3 Start watching this issue

                Created:
                Updated:
                Resolved: